Showing posts with label Queen of Hearts. Show all posts

Monday, 2 May 2011

Queen of Hearts Jacket Finished!

DRUMROLL PLEASE!
Finished Jacket
It's done!  Hooray!  I just hate it when project drag on longer than expected and you become a bit jaded and uninspired by them, which is what happened to this towards the end.  Instead of rushing it and most likely bodging it up I had a break and took my time when I encountered problems and it seems to have worked.
Jacket Back
To finish off I hemmed and added lace to the sleeves and had fun adding the eyelets to the front and lacing it up.  I have not used them before and I was really surprised with how easily they went it (I did do one back to front, but I think its part of the learning curve!)  I am pretty happy with it though it is a little small, I am hoping that it will be fine for the day.

Quick snap of me trying it on, not the full outfit as I haven't made a top yet but it does go well with my dress!
Smile for the mirror shot!

Sunday, 1 May 2011

Queen of Hearts Jacket - Work in Progress 4

Phew!  This project is now epic!  I didn't realise how much time and effort goes into a jacket or coat rather than a summer dress!  It has been very interesting though and I like to learn something for each project I make.  So were did I get to last time...

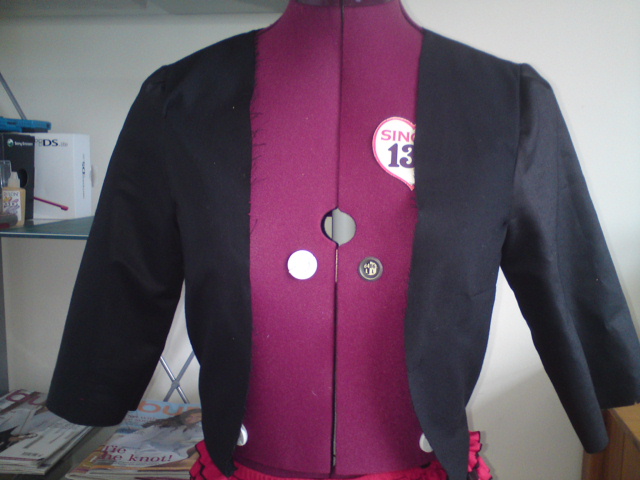
I  have lined the peplum and sewn it to the jacket...
Peplum and back of jacket
...which was pretty straight forward (look at those lined up seams :) they make me happy!)  Then I added the sleeves, now this was more complicated.  I sewed them on and tried on my almost competed outer layer and....it was waaaaay too tight on the sleeves.  I couldn't even move my arms so I widened the arm holes (a couple of times until I got it right) but now at least I think I can move while wearing it, which will be an advantage to dancing.
Sleeves unfinished
Next came the lining which I basically stitched up the same way as the jacket outer though I am also lining the sleeves which is not included in the pattern. 
Lining with sleeves
Piccies of my lining, which obviously will go in right side out but it looked pretty on my model like this.
Lining back
Now I have sewn in the lining which included hand sewing where the bottom of the jacket meets the peplum and tried it on again.  It has come up small, which is unusual for me, it is normally the other way around.  I think it will be fine, it will just mean some adjustment to the corset-style ties at the front so they don't look too ridiculous.  If I  made this pattern again I would make it maybe 2 sizes bigger, a 12 instead of an 8.  I read a review which said you needed to make it smaller than your normal size which I should not have listened to.  I vary between a 8-12 in different patterns anyway but never mind, it's only a costume after all.  Just finishing the sleeves and the eyelets and lacing to go!  Woo!

Wednesday, 27 April 2011

Queen of Hearts Jacket - Work in Progress 3

Another day on the jacket, this is starting to become a bit of an epic project!  I sewed the peplum together, which I think looks pretty cute and with a definite playing card feel.
Peplum back and sides
When I planned the jacket I wanted to have hearts on the peplum but I just couldn't work out how to sew applique them on without fraying.  I thought about using felt as it doesn't fray and sewing it on by hand but when I looked I didn't have enough red left just bucket loads of white.  I didn't want to spend any money if possible, especially as I do have fabric left over.  So I turned to the net, I had my shiny very fraytastic fabric and I found a great video meant for quilt applique with freezer paper.  

Woo!  Get in! I already have some freezer paper.  It worked pretty well on my quite large heart shapes and I am lining the jacket so no one can see the messy back where I cut the paper out heehee!
I zigzag stitched around the edge as my fancy stitches were not that great for this and I didn't mind the stitching being seen.  I also didn't fancy handsewing all 11 hearts on either.  So now the peplum looks like this....
I must confess, the half red and white heart in the middle is a bit of a late addition.  I accidentally tore a hole in the fabric with my overlocker as the fabric was quite slippery and got away from me more than once.  I was thinking about cutting a bunch of little hearts and scattering them over the skirt but I liked the look of just the large hearts on the bottom and thought maybe a half and half large heart would look ok.  Plus it will be right over my bum which I am sure my friends will love!  haha!

Tuesday, 26 April 2011

Queen of Hearts Jacket - Work in Progress 2

Finally got some sewing in today as the sun was a being a bit wishy-washy and not tempting me to the garden!  So back to the Queen of Hearts jacket, there were lots of pieces (I only cut 2 the wrong way round, and one was only little) so I separated the colours on to my bookshelves so I wouldn't lose any. 
   
From bottom, pattern, lining, red and top out of picture is red
(A collar facing still managed to disappear though!  Luckily its the smallest piece so I just re-cut it.)
Lllllllllllots of progress pictures.............
Front bodice 

Back Bodice
 This looks very striking I think!
Collar
 The collar was quite fiddly, and the instructions were not particularly clear, it made it sound like you had to sew the facings on twice rather than the proper fabric.  I chose to alternate every piece red and white in the end which I think has a lot of impact.
Front bodice with collar
Back bodice with collar
Just look at that lining up!  That makes me so happy!
Bodice with Queen collar
I also made the huge stand up Queen collar included in the pattern as I want it to be over the top and obvious that I am the queen of my birthday and not just a boring card :p  Obviously none of it is lined yet but you can see the shape.  I do have interfacing air bubble (see previous post) but it is not as obvious as I first thought.  I should have interfaced the lining not the cheapy satin but ah well!  I have started the jacket peplum but just chomped a big hole in it :S I do have a way to save it though!

Saturday, 16 April 2011

Queen of Hearts Jacket - Work in Progress

This jacket has become a very slow project, luckily I started working on it very early so I haven enough time still.  I have cut out all the white pieces.....


and all the red! 

There are so many pieces and I haven't even started the lining yet which is going to be a black cotton.  The white and red are some very cheap satin fabric that looks bright and shiny but doesn't breathe well so I am lining it with cotton rather than something shiny as it will be nicer next to my skin.  Also I chose red and white instead of the red and black in the pattern picture for two reasons, firstly I already had enough of the red and some white and no black and secondly I think it more closely resembles the playing card suit rather than just going as a Disney style queen.  I want to make the costume my own rather than a copy of Disney or Tim Burton as I just think its more fun that way and I don't have to worry about being accurate.

I have been having problems with my interfacing though.  I am using fusible interfacing on the bodice of the jacket and when I ironed it onto the back white piece it has come up really bubbly like this:


This makes me sad.  I have used it before, though not with this cheapo fabric and it hasn't done this.  I have been more careful with the other pieces and the smaller ones have come out far better.  I then padded out my ironing board with a towel, as the cover is wearing thin and I could also see the marks on the fabric and this helped but it is still not gone.  If anyone has any suggestions/advice for using fusible interfacing and keeping the bubbles out, or even getting rid of them after they appear?  Please let me know.  :)

Also my Daddy has been taken into hospital today and I'm wishing him all the best for his operation later tonight xx  (Sewing keeps me from worrying too much)

Monday, 4 April 2011

Hair Accessories and Queen of Hearts skirt

I have had a lovely long weekend away from work so have got quite a bit of sewing done.  Yay!  Today I finished off some hair accessories to put in my online shop as I haven't updated it in a while and I feel I really should. 

I made these little clips from fabric yo-yos and some beads and sequins as well as jazzing up the clips with some glitter.
This headband is the same yo-yos but with vintage buttons from my grans stash on a fabric and elastic band.  I really like this and might have to make one for myself!

I whipped this up this afternoon in a few hours too, its for my Queen of Hearts costume.
The black is slightly see through which is what the white dots are, I am planning on wearing it with tights, maybe ones with hearts if I can find some

It didn't need to be amazing, I just folded over the top and added some elastic which isn't the best way of finishing it but I didn't  have any really wide elastic which would have looked good as a wasit band and don't want to spend too much on a costume.  I also used the fabric upside down so it has red and black stripes rather than just red as I think this suits it better.
Piccy shows the length
I am planning on using the pattern I posted previously to make the jacket and I will probs use a vest top and decorate it myself to go with the skirt.  As it was stretchy fabric I just decided to use it as a tube rather than creating the fuller skirt of the pattern but thought it would be too over the top for a dress.  The top I will restrict as to what I can manage in the time limits though I am ahead of myself at the moment.