Monday 30 May 2011

Inchies and ATCs

Further to my sewing break, which I am now itching to get back to, I joined a swap on Craftster for beginners inchies and ATCs.  For those who don't know what that is, they are both papercrafts that can be decorated however you wish and are limited only by size.  An inchies is an inch by an inch square and an ATC means altered trading card so is the same size as a regular playing card.  In the swap I took part in we all chose themes for our crafts and I swapped with 3 other memebers meaning I made 3 ATCs and 10 inchies.  I highly recommend Craftster swaps, they are extremely well run and have a huge amount of different themes and crafts.
1st ever inchies


I have displayed my inchies and ATCs in a card ready for posting and mine are travelling all over the world which gives me a little thrill of excitement!

 A few of the inchies I have made interactive including this owl hiding on a branch...
...and the robot hiding his heart.
The ATCs were a little bigger and I picked my favourite theme from each one to craft for it.  There were loads of things I could have chosen but I went with....
Batman
Richard Scarry
Vintage/Retro
For some reason, even though I flipped the photos before uploading them they just won't stay horizontal, any ideas?

Sunday 22 May 2011

Mr Marshmallow

I really enjoy making felt food and I also like the little faces and characters that you get in the world of plushies, especially the Japanese inspired ones.  So this in my little prototype, Mr Marshmallow!
What do you think?  He is a bit wonky looking but he is hand sewn and has a cute little face.  I was thinking of adding cardboard to his top and bottom to make him more flat but them he won't be totally squishy like he is now. 
You can see the wonky top better here.  Is wonky sewing just a statement of handmade or do you think it needs to be improved?  All comments welcome as I want to improve it and make it better.  I have plans for a whole host of different characters but want to perfect the basic first.

Friday 20 May 2011

Patchwork Quilt Mug Rug

Another of those quick little projects before I start a new garment and I picked a mug rug!  This is the second one I have made and it came out much better than the first though perhaps a little on the large size.  I came up with the idea whilst finishing the frst one and though it would be cute to make a mini quilt.
I patch worked the pieces together and made a little doll and bear from felt and hand stitched them.  I also learnt how to do mitred corners on the binding this time which I did not understand the last time I tried.
The quilting from the back.  My machine did something funny and pulled some of the pink top thread through but after re-threading it was fine.  I really like the flowery binding but haven't got much left now.  I drew it all out on paper first and sandwiched a piece of felt in the middle.  This is now for sale in my shop as it was pretty much made for fun rather than for someone.

Sunday 15 May 2011

Time for something a bit different

After my epic costume sewing I decided to do something different and make some quick satisfaction jewellery.  I find after a long project, a couple of little ones get me back into the swing of things and prvent me from becoming jaded.  It also helps to have interests other than sewing which I can move onto when I need a break but will still allow me to be creative.

I started a bunch of fimo charms a little while ago but had gone off them so I got my act together and finished them off for sale in my shop.
Bakewell Tart
Cherry Iced Bun
Cherry Lemon Pie

Watermelon Cream Pie

Watermelon Pie
I am a beginner at fimo charms and canes but I really enjoy seeing if I can make things with it even though it is pretty time consuming.  I have this book http://www.amazon.co.uk/Miniature-Food-Masterclass-Angie-Scarr/dp/1861085257/ref=sr_1_3?s=books&ie=UTF8&qid=1305461775&sr=1-3 which is really good for making dolls house food and realistic miniatures.

I did a bit of stash busting with my beads and charms to make a couple of summery necklaces too.
Butterfly Garden  
Daisy Drop
I'm not sure which one I like best but I would wear both and the little pink beads on the butterfly one are vintage from my grandmother's sewing box.  This is an unashamed plug but all these items are available in my Misi shop http://www.misi.co.uk/shop_info.php?domain=sorbetsurprise  I have been meaning to add some news things for a while and finally got around to it.  I am also wondering if I should replicate my shop on etsy, it is more popular but it is also a much bigger site so I don't know if it would be worth my while or not.

Saturday 14 May 2011

Burda May 2011

I wasn't overly impressed by this month's Burda, I think the cover dress is the main selling point and appears 3 times which sort of proves my point!  However I loved the fabric used in the first Seaside Summer collection which was all about the Toile-de-Jouy fabric and is actually something I have been looking for recently.  I envision a lovely china print '50's dress......anyway on to the pictures!
 My favourite piece is this lovely skirt, it looks so swirly and fun and the dip-dying at the bottom of the skirt is such a good idea!

The line drawing for this dress is really pretty and I wish there was a better picture, its a shirred top and tiered frill skirt, which is really floaty and pretty.
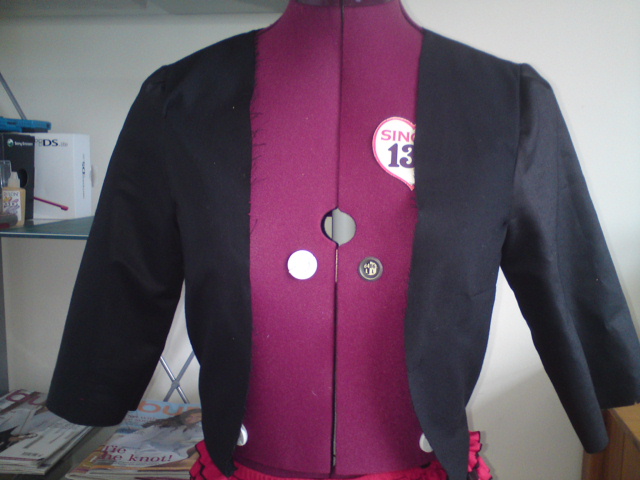
 I like the cut of this little jacket but I don't really like the fabric they used to make it, but that can be easily changed.
I wish this was an adult  pattern!  The stripes, boat neck and little anchor appliqué are so cute!

Burda also had a go at the 1950's look this month which I was really looking forward to.  In fact it wasn't that amazing but there are a few little gems.
This is the cover dress I was talking about, it is shaped on the bust and gathers up in the skirt with a little flower-style detail which is really pretty.  I like it best here though it was also shown with the cover up on and in a bright orange satin fabric.  I have a feeling it won't fit so well on larger chested ladies but would be lovely for summer weddings.

This is the other Fifties Fashions piece that I think captures the look best.  I would never wear it but I love the look of the little bra top and flowing skirt (the skirt pattern from earlier and the bra made from the top of the above dress.)

From the crafty projects section I really like these fairy lights that have been jazzed up by making tassles from fabric and wrapping them round the bulbs.
Worst Dressed Award
I started picking one pattern I didn't like last month and thought I would carry it on, it was tough this month as there was on whole section, Scintillating Prints, in which I didn't like any of the fabrics they used and my choice does come from here, though the runner up was a shiny pink dress with the zip down the side.
Honestly I could have chosen any outfit from this collection but this was my worst.  I hate the print, it is really 90's and out of fashion.  I hate the print combined with the rouched style which also looks outdated.  I especially hate the type of fabric they used, a cheap looking stretchy jersey.  Why you would want to wear this on the beach I don't know, it fits a '90's disco much better!

Let me know what you think of these and the other patterns in May's mag!

Monday 2 May 2011

Queen of Hearts Jacket Finished!

DRUMROLL PLEASE!
Finished Jacket
It's done!  Hooray!  I just hate it when project drag on longer than expected and you become a bit jaded and uninspired by them, which is what happened to this towards the end.  Instead of rushing it and most likely bodging it up I had a break and took my time when I encountered problems and it seems to have worked.
Jacket Back
To finish off I hemmed and added lace to the sleeves and had fun adding the eyelets to the front and lacing it up.  I have not used them before and I was really surprised with how easily they went it (I did do one back to front, but I think its part of the learning curve!)  I am pretty happy with it though it is a little small, I am hoping that it will be fine for the day.

Quick snap of me trying it on, not the full outfit as I haven't made a top yet but it does go well with my dress!
Smile for the mirror shot!

Sunday 1 May 2011

Queen of Hearts Jacket - Work in Progress 4

Phew!  This project is now epic!  I didn't realise how much time and effort goes into a jacket or coat rather than a summer dress!  It has been very interesting though and I like to learn something for each project I make.  So were did I get to last time...

I  have lined the peplum and sewn it to the jacket...
Peplum and back of jacket
...which was pretty straight forward (look at those lined up seams :) they make me happy!)  Then I added the sleeves, now this was more complicated.  I sewed them on and tried on my almost competed outer layer and....it was waaaaay too tight on the sleeves.  I couldn't even move my arms so I widened the arm holes (a couple of times until I got it right) but now at least I think I can move while wearing it, which will be an advantage to dancing.
Sleeves unfinished
Next came the lining which I basically stitched up the same way as the jacket outer though I am also lining the sleeves which is not included in the pattern. 
Lining with sleeves
Piccies of my lining, which obviously will go in right side out but it looked pretty on my model like this.
Lining back
Now I have sewn in the lining which included hand sewing where the bottom of the jacket meets the peplum and tried it on again.  It has come up small, which is unusual for me, it is normally the other way around.  I think it will be fine, it will just mean some adjustment to the corset-style ties at the front so they don't look too ridiculous.  If I  made this pattern again I would make it maybe 2 sizes bigger, a 12 instead of an 8.  I read a review which said you needed to make it smaller than your normal size which I should not have listened to.  I vary between a 8-12 in different patterns anyway but never mind, it's only a costume after all.  Just finishing the sleeves and the eyelets and lacing to go!  Woo!